If you want to know how to reduce sibilance in vocal recordings and smooth high frequencies, the secret is the De-Esser 2 Plugin in Logic Pro X & Logic Pro 10.4.5.
A De-Esser is actually a fast-acting compressor that compresses at high frequencies or a certain band of high frequencies. A De-Esser is primarily used to reduce sibilance in vocal recordings. It can also be used to smooth out high frequencies in other instruments such as hi-hats or cymbals.

A De-Esser is essentially used on vocals to reduce any harsh hiss produced from the S, F or T sounds. Sibilance also depends on the voice itself. It also depends on the position of the microphone.
So, if you are at the side of the microphone slightly, it will sound less essy than if you're directly in front of the microphone. The placement of mic can help with sibilance as well the distance will make a difference with sibilance.
If the vocalist is right up close to the microphone, then there may be more sibilance than if the vocalist is further away from the microphone. However, you may not want the vocalist too far away from the microphone because you may capture more room sound which you may not want for your recording but a De-Esser can help reduce sibilance in your recording.
Be careful though when you're De-Essing because if you have too much of this, then it may sound like the vocalist has got a bit of a lisp but the correct amount can make a vocal recording sound less harsh.
I generally like to use a De-Esser before the compressor, so I'm not compressing the unwanted sibilant sound but sometimes if it's a really essy recording, I will also use a De-Esser after the compressor as well as before the compressor.

Let's get to know in detail about the De-Esser 2 plugin in Logic Pro 10. To open it, we need to go down to Dynamics and then De-Esser 2.

In this plugin, we have a few different dials and controls and we also have the visual meter displays.

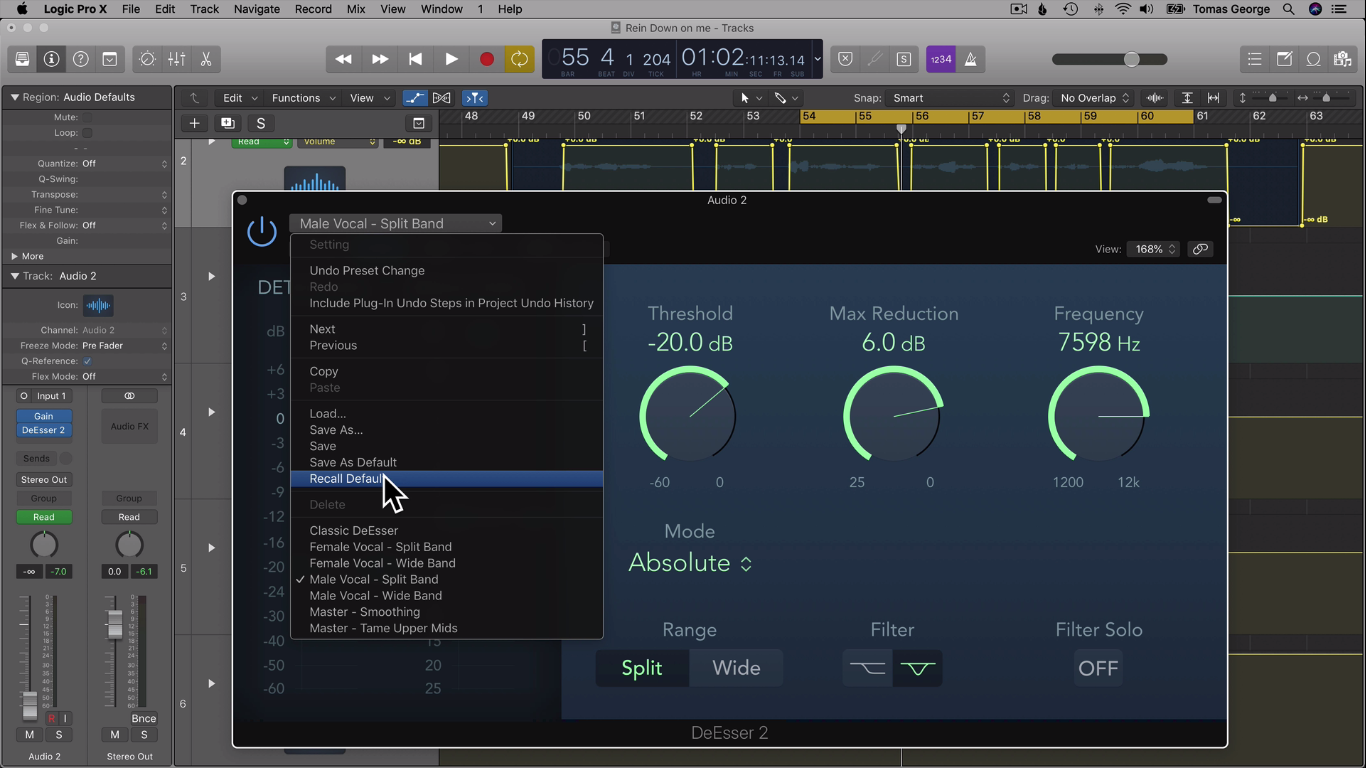
We also have a few different presets we can choose. I'm going to Record Default and work from the default.

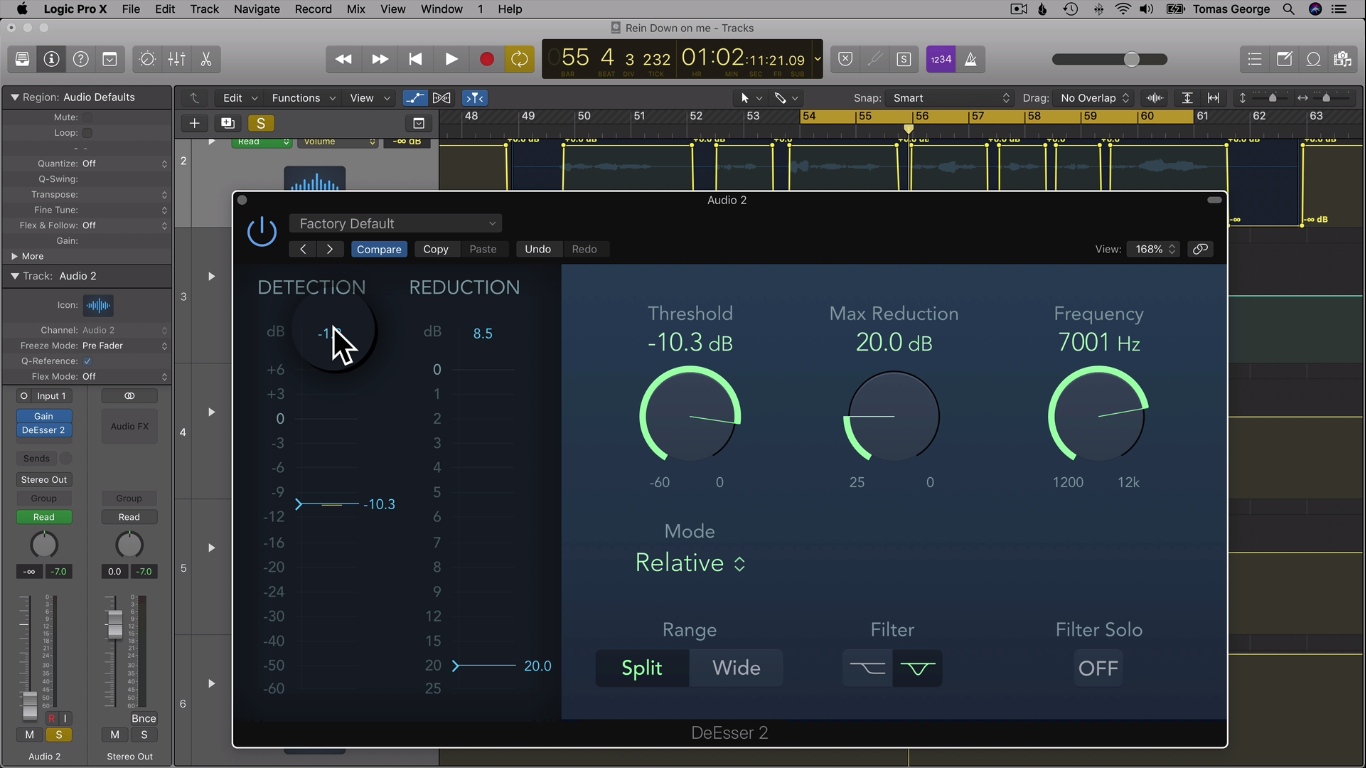
Let's have a look at the different settings now. On the left, you'll notice we have the detection meter slider. This allows to drag up or down the threshold and gain reduction will only be applied to signals above this number.

We also have a detection meter that shows us the input signal level and the level is in yellow when it goes above the threshold.

The maximum number is displayed at the top and you can click to reset this number.

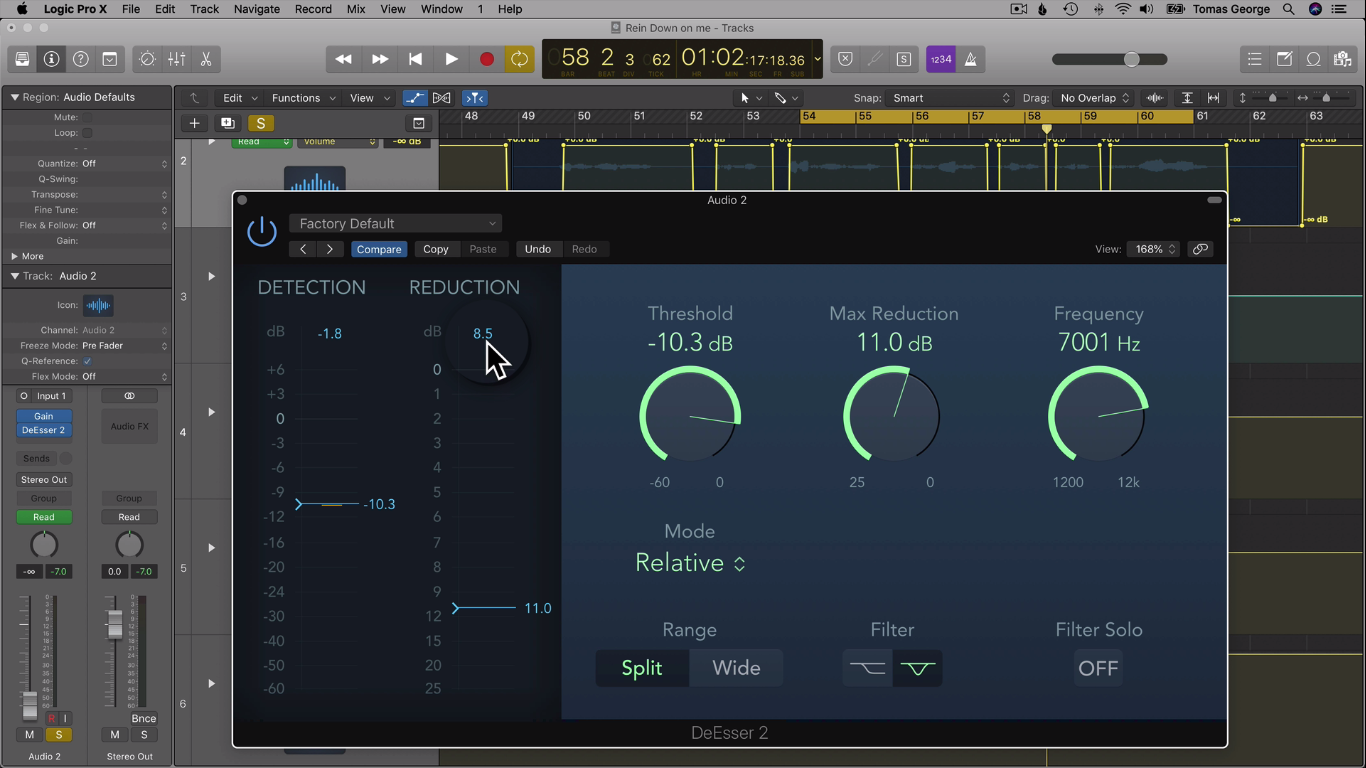
Going along, we have the Reduction Meter slider. This allows you to drag and set the maximum reduction level. We also have a reduction meter, so this shows the amount of gain reduction that's being applied.

The maximum number is shown in the number above which you can also click to reset.
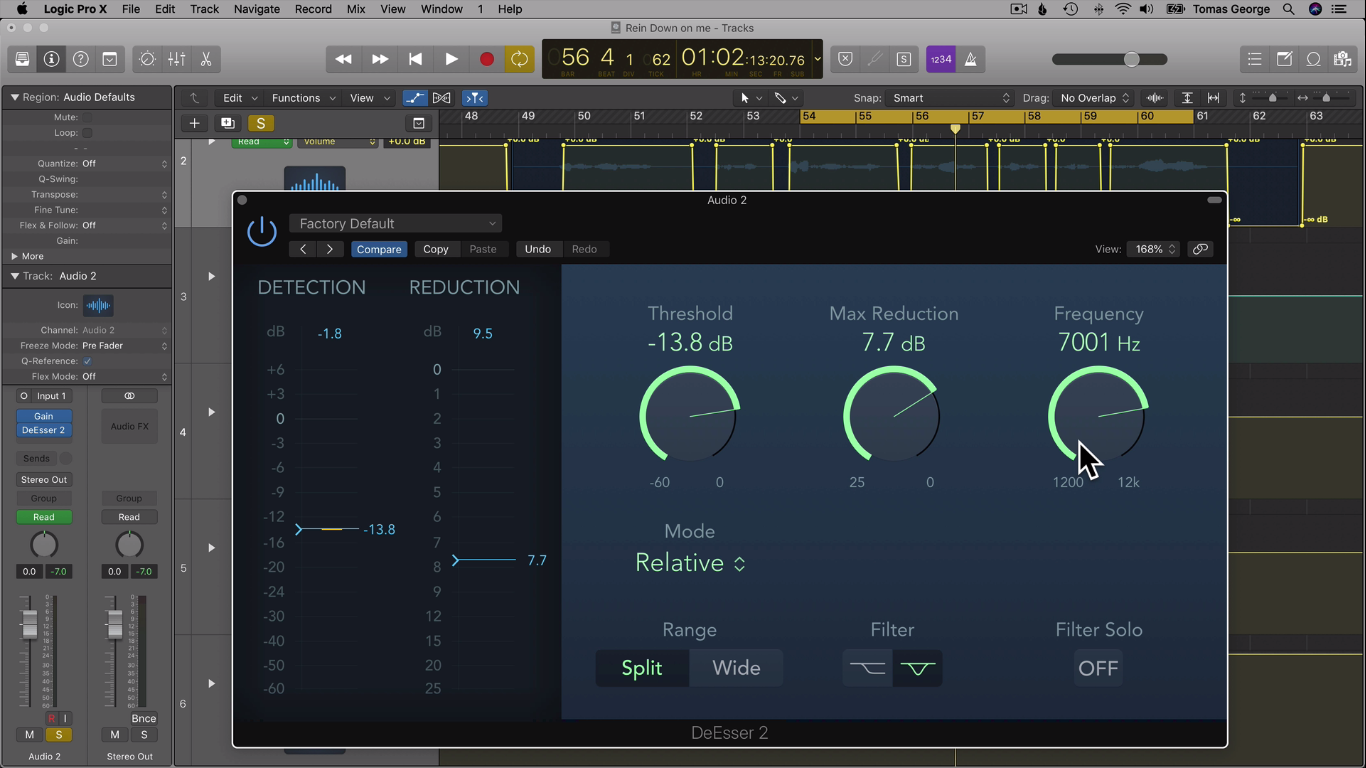
We have a few more controls and the first one is the Threshold. This dial does the same as the first slider on the left. A threshold basically only applies the reduction to signals above the selected number.

If you have it at 0.0dB, for example, it won't apply any reduction to the signal because the signal won't be above 0.0dB.

The next one is Max Reduction and this also does the same as the 2nd slider adjacent to the 1st slider. For example, 9.5dB is the maximum reduction that will be applied when the signal passes past the threshold.

The higher the number, the more gain reduction will be applied to your signal. If we lower it, we have less gain reduction applied to the signal. We can see the amount of reduction with the blue bar in the reduction meter.

As you can see in the picture above, this is the Center Frequency that you're going to reduce. It's the frequency where the sibilance is detected at. Generally, I'd have this between 5,000Hz to 10,000Hz. It really does depend on the voice that you're mixing. For females, female vocals frequency may be a little higher.

Next, we have the Filter Solo button. It is really useful. It solos the frequency that you've selected. It also allows you to just listen to the frequency that you want to attenuate.
In the vocal, “♪ ♪ I push against the Earth ♪ ♪”, it's the “against” that I want to reduce. The frequency that I want to attenuate is around about 7,800Hz. I recommend having this Filter Solo button selected, finding the frequency that you wish to attenuate.
I also recommend setting the right threshold for your recording and finding the max amount of reduction. Like I said though, if you have too much De-Essing going on, it may sound like your singer has a bit of a lisp. You do want some S sounds though. You don't want to cut out too much but you may want to cut out some so the recording doesn't sound too harsh.

Going along, we can choose Filter Type. Here we have a Band-pass filter and we also have a high shelf filter.
The Band-Pass Filter mode is useful for isolating and reducing a specific band of high frequencies. If you just want to reduce the band around a certain frequency, then I recommend using the band settings.
The High Shelf Filter mode though could be useful for reducing a fill range of essy sounds that are above the frequency that you've selected. If you want to reduce the frequency and also all of the high frequencies above it, then I recommend using the high shelf but if you just want to reduce a specific band, then I recommend using band mode.

Then we have the Range setting i.e. Split or Wide. These both affect the filter frequency range.
Split affects the signal tightly around the centre frequency of the frequency value that you select. It can give you a more narrow reduction.
The Wide mode will affect a broader range around the frequency value.

We also have 2 different modes. We have Relative and Absolute.
In the Absolute mode, if you have a very quiet signal at certain points, this can only be processed if the threshold is set to a very low value because the audio needs to go above this threshold for it to be filtered or reduced at the frequency that you select.
In the Relative mode, the signal level can actually be higher or lower than where we have the threshold set. We can adjust the threshold so it's just triggering the De-Esser and the threshold will be adjusted for a quieter or louder S sound.
With this mode, we just set the threshold so it's triggering the De-Esser and the threshold will be adjusted automatically with the De-Esser for quieter or louder S sounds. We still need to set the threshold here. However, if the level goes up, then it will automatically raise the threshold level.
If there any sibilant sounds that are quieter or louder in the audio, the threshold will be adjusted in this relative mode. So, this mode can actually give a more consistent effect and sound smoother than the absolute mode.
I do recommend going through and listening to your audio, reducing some of those harsh sibilance sounds but maybe not too much or you may get a bit of a lisping sound.
So, that is the De-Esser 2 plugin in Logic Pro X. It's kind of a multi-band compressor that only operates at a single frequency band. The De-Esser is mainly used for vocals to tame some of the sibilant sounds but we can use it for other instruments such as cymbals or hi-hats just to smooth out the sound and attenuate some of those piercing frequencies.
When De-Essing vocals, I do recommend going through and finding the right frequency you wish to De-S. The Filter Solo button can really help with this, then setting the correct threshold, choosing your mode and then adding the max reduction.
Make sure you don't reduce too much because you still want some of those S sounds and if you reduce too much, it may sound like the vocalist has got a bit of a lisp.
However, a De-Esser can be really great just for reducing some sibilant sounds that you get from S’s, F’s, and T’s. So, thanks for reading this article. I hope you found this article useful and you have learned in detail how to use the De-Esser 2 Plugin in Logic Pro X & Logic Pro 10.4.5.
Cheers,
Tomas Geroge
