If you want to bring realism to your virtual string arrangement by using Studio Strings instruments in Logic Pro 10.4, this article will explain in-depth about it.

To create a new Studio Strings Software Instrument,
Click on the “+ button”.
Go over to “Software Instrument”.
Select “Stereo” from the Studio Strings dropdown.
Click on “Create”.

This is how Studio Strings look like in Logic Pro 10.4. I'll open Musical Typing by hitting Command and K. We can instantly tell these sounds actually sound pretty good for string samples. They have sampled in and recorded real string players to get the sounds.

If we click on Violins 1, we get all these different instruments.
Sections Single Instruments
Small Section Violin 1
Disco Strings Violin 2
Singer/Songwriter Violas
String Ensemble Cellos
Double Basses
Playing different octaves will actually be the same as the ranges on these instruments. For example, if we play a note down in this octave range, we won't be able to hear this violin because violins can't physically go that low.
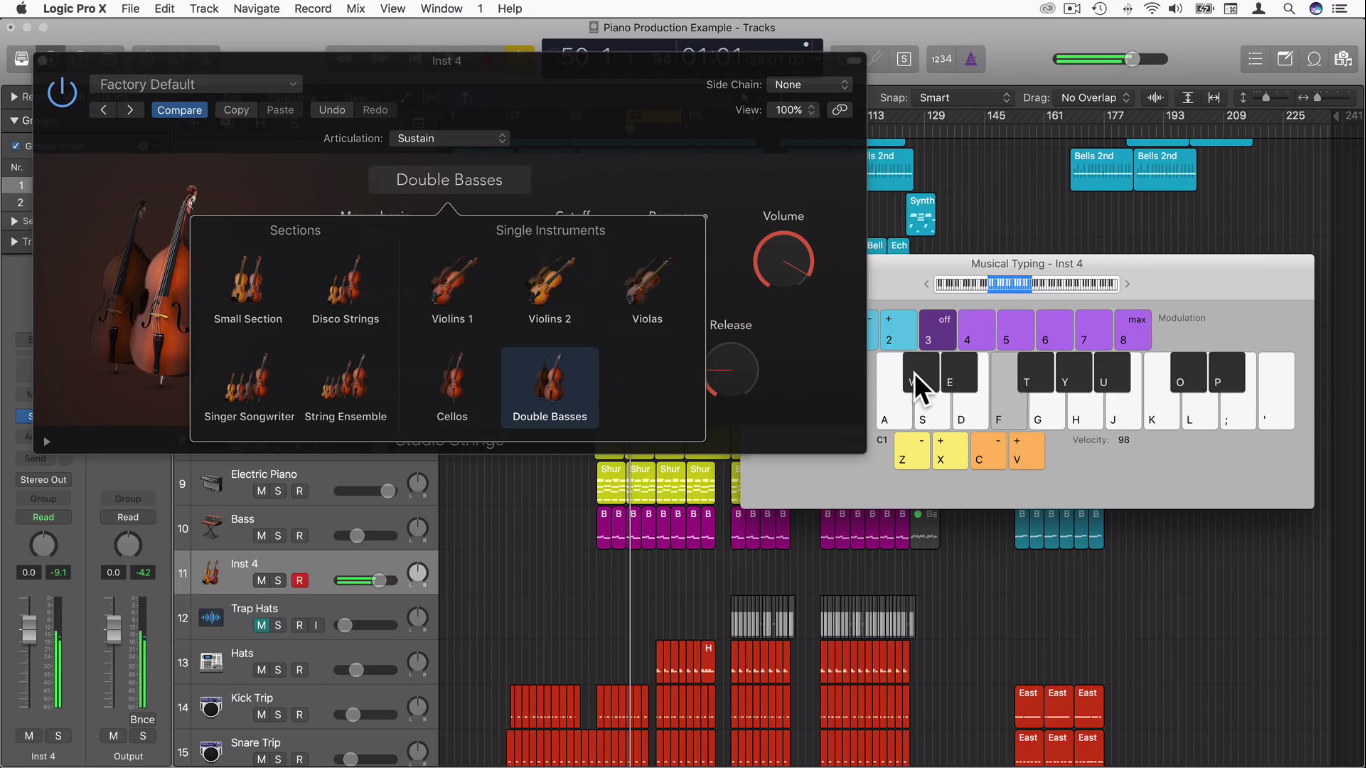
However, if I change it to Double Bass, you can hear this double bass because double basses play in this range.
I’ll change it back to Violins and my favourite thing about this instrument is the Articulation. One thing we can actually do is set different articulations for different midi notes which is absolutely amazing.

We have different articulations. So, we have Sustain, Staccato, Spiccato, Fall Long, Fall Short, Scoop Fast, Scoop Slow, Accented Sustain, Crescendo Fast, Crescendo Slow, Fortepiano Fast, Fortepiano Slow, Glissandro Down, Glissandro Up, Pizzicato, Trill Semi, Trill Whole, & Tremolo.
It's a good idea to go through all of these just to listen to the sound. Scoop Fast is quite an interesting one. You can have different midi notes playing Scoop Slow. It doesn't have to be all the way through. It could just be one little section that has Scoop Slow.
Some of these terms are the classical or Italian terms. You don't really need to memorize all of these terms. Pizzicato & Trill are 2 of my favourites. Tremolo is a really great sound on this instrument. It can be used to create some dramatic music, introductions, & buildups. If you're making a film score or anything like that, Tremolo can be really fun.
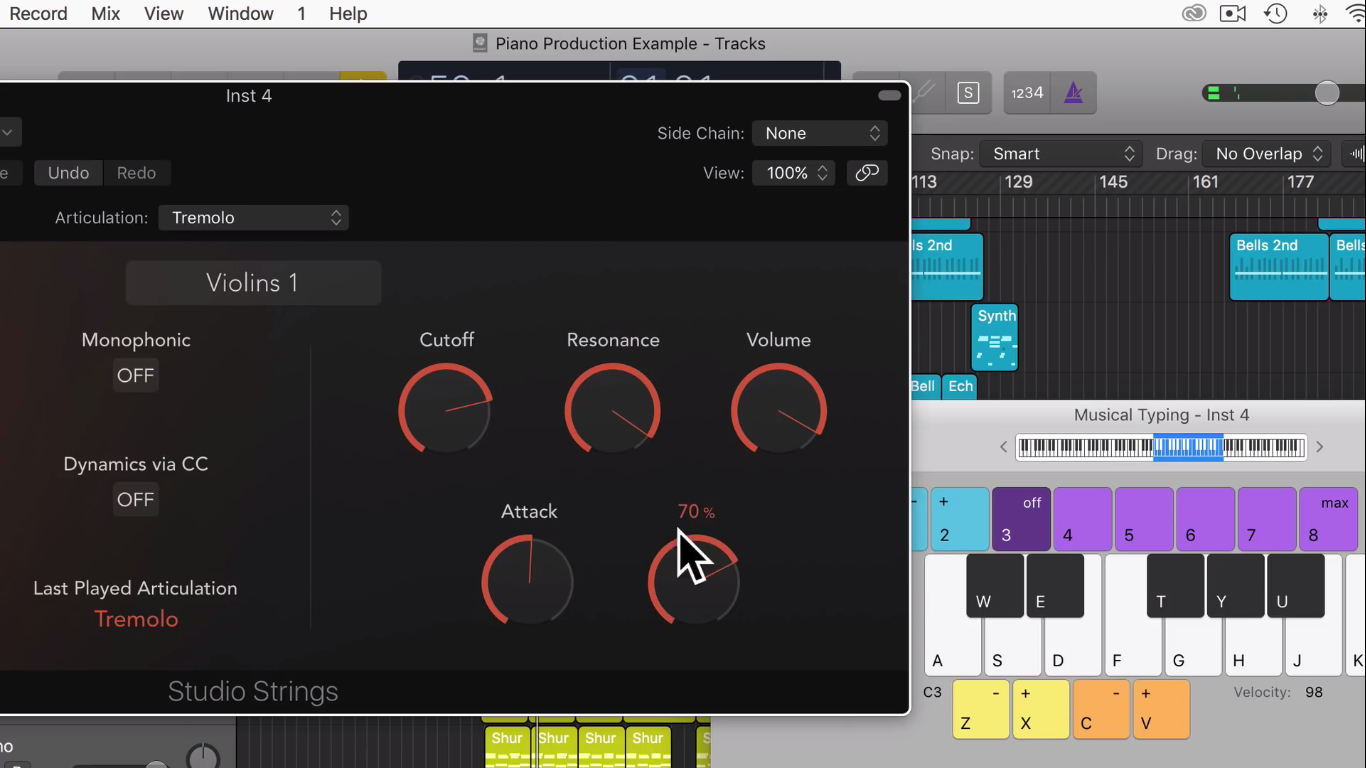
The Cutoff is used to filter out some of the higher sounds.
Resonance can have a little boost before the cutoff. However, if the resonance is too high at a certain cutoff, it might create a ringing sound.
Alpha Volume is used to control the volume level.
An Attack can be increased if you want to come in slower and a fast attack to enter straight away. Sometimes, the slow attack comes in nice to gradually build in.
A fast “Release” can be used to stop the sound after letting go of the note at 0%. If I increase the “Release” and let go of the note, it will still ring out which is quite nice for string sounds.

I recommend adding some reverb as I do like to add Reverb to my string sounds as well. Going down, we have a little dropdown arrow which will show more controls.
If we switch on the Monophonic mode, we can only hear one-note as it will play one note at a time even if we are laying multiple notes. If I have it switched off, it will get polyphonic. So, it will play 2 notes at the same time.
We've got articulation modes included in Logic Pro which is absolutely amazing. Whereas, before you might have to use something like Kontakt which is a third-party plugin. Now, you can do loads of really interesting string sounds just in Logic Pro.

We have Auto Voice Split into the Small Sections. When we play in a section like this, it will actually have different notes for different instruments. So, for example, the higher ones will be the violins, the lower ones may be the cellos or the double bass depending on what section you have. So, it's just going to split the samples on the keyboard depending on how high or low you are.
We only get this on the Sections because, in the sections, we have different string instruments. And it's a good idea already because you do want the double basses and the cellos to play lower, the violists to play mid ranges and the violins to play higher if you want to make your strings sound more authentic.
Going down we have Dynamics via CC. This allows us to have dynamic expression control by midi. So, we can use the modulation wheel on our midi keyboard to control the dynamic expression.

Just remember that we need to click the little arrow to see the advanced settings. We have some controls for Vibrato and Dynamics. We can turn on/off Legato between transitions and voice split settings.
We can also extend the key range which will mean we can play the samples out of the range it should be played on the instruments. This may sound a bit artificial and fake. However, if you're just writing in parts quickly or just sketching out ideas, it can be useful.
It might be quite fun for soundscape or sound design. However, if you want it to sound realistic, I don't recommend having it checked. They can be used for, like I said, just for sketching out some ideas.
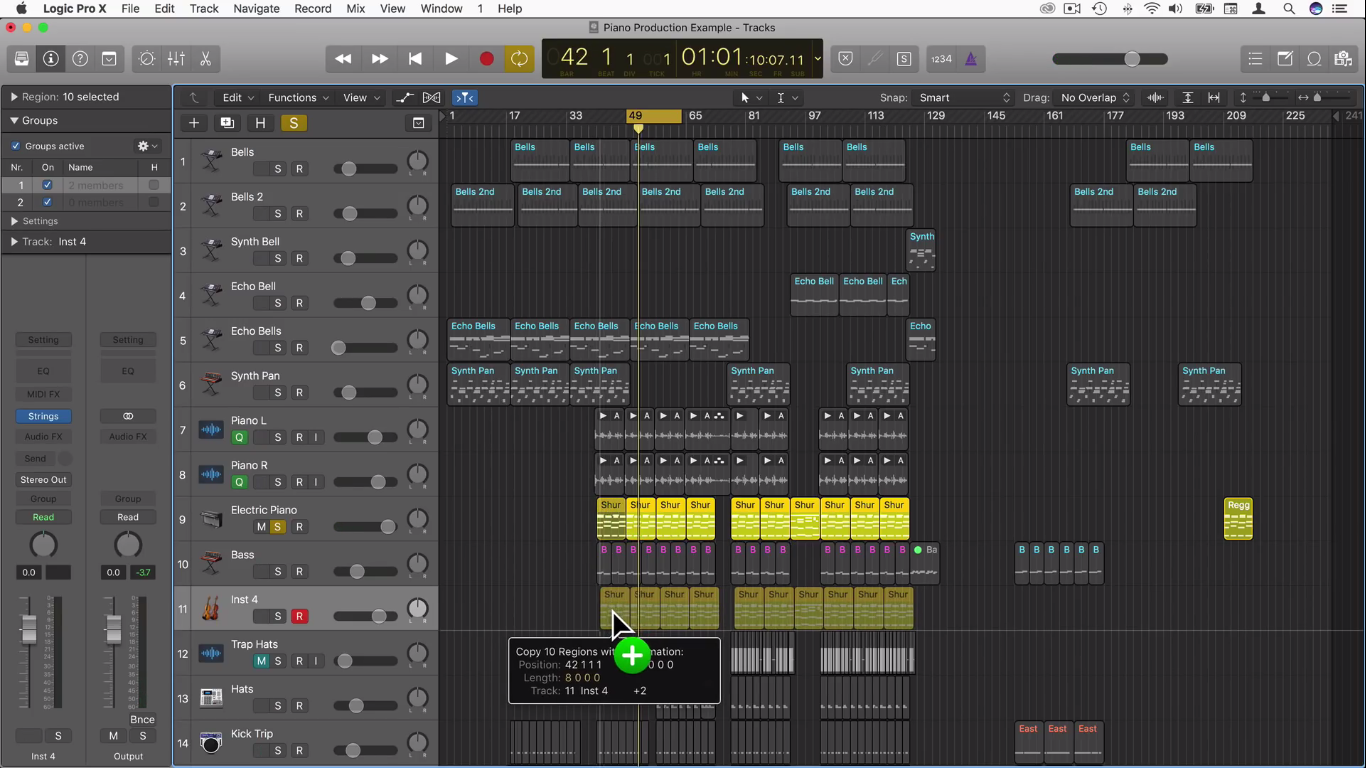
Now, in my track, I want the electric piano part played on strings as well. So, I'm just going to hold down the Alt key and drag it down. Open up the midi information in the piano roll.

We could select these notes as the first chord.

After selecting the first chord, with a right-click, go down to articulation. Choose what articulation you want just for this bit of midi information which I think is amazing. You can change these articulations for each individual midi note.
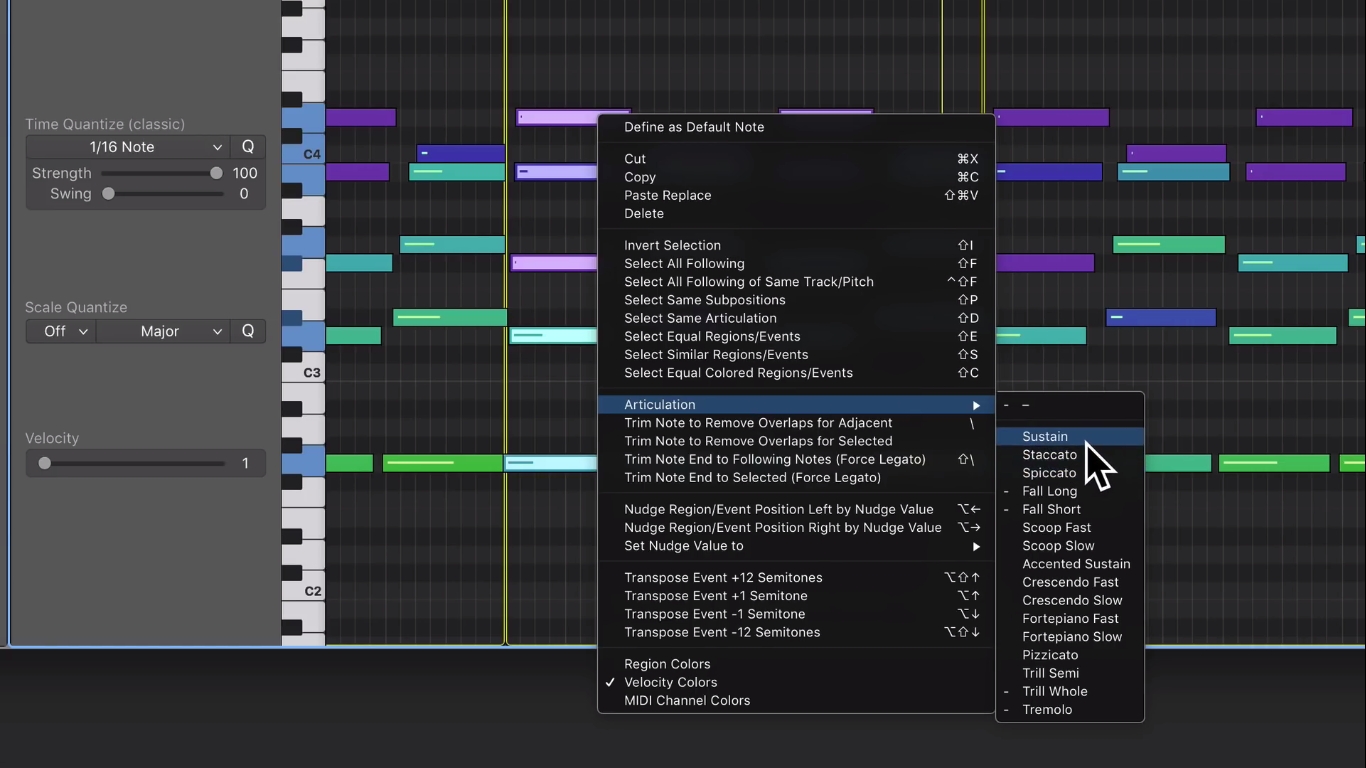
What if you have messed up and want to change back to the original? Just select them all by dragging over and if I right-click again, I can select Articulation and change it back to Sustain.

I would normally add some kind of reverb on to this as well. To add a reverb, click on Audio FX as shown in the image above, go down to Reverb, select ChromaVerb and choose Stereo.
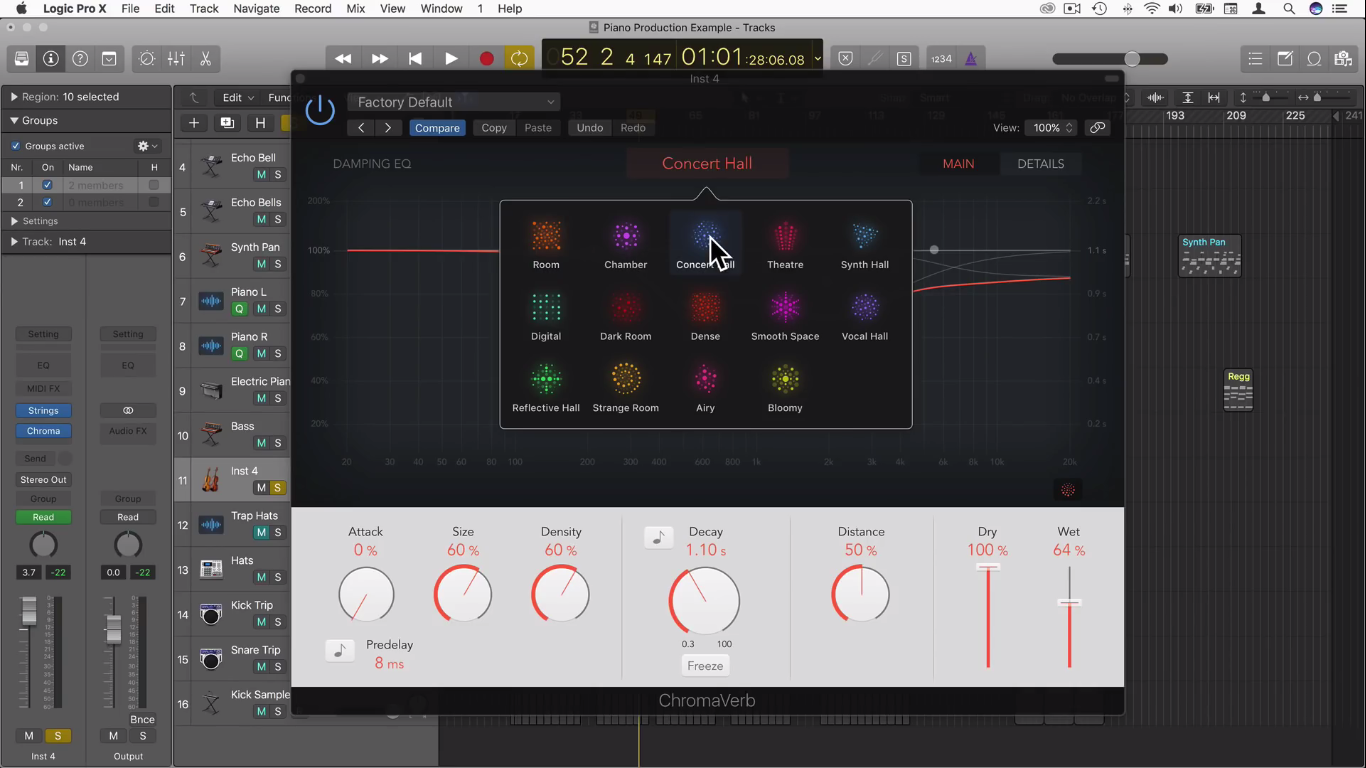
We can choose the Concert Hall. It will sound a bit lusher with a little bit of reverb on the strings.
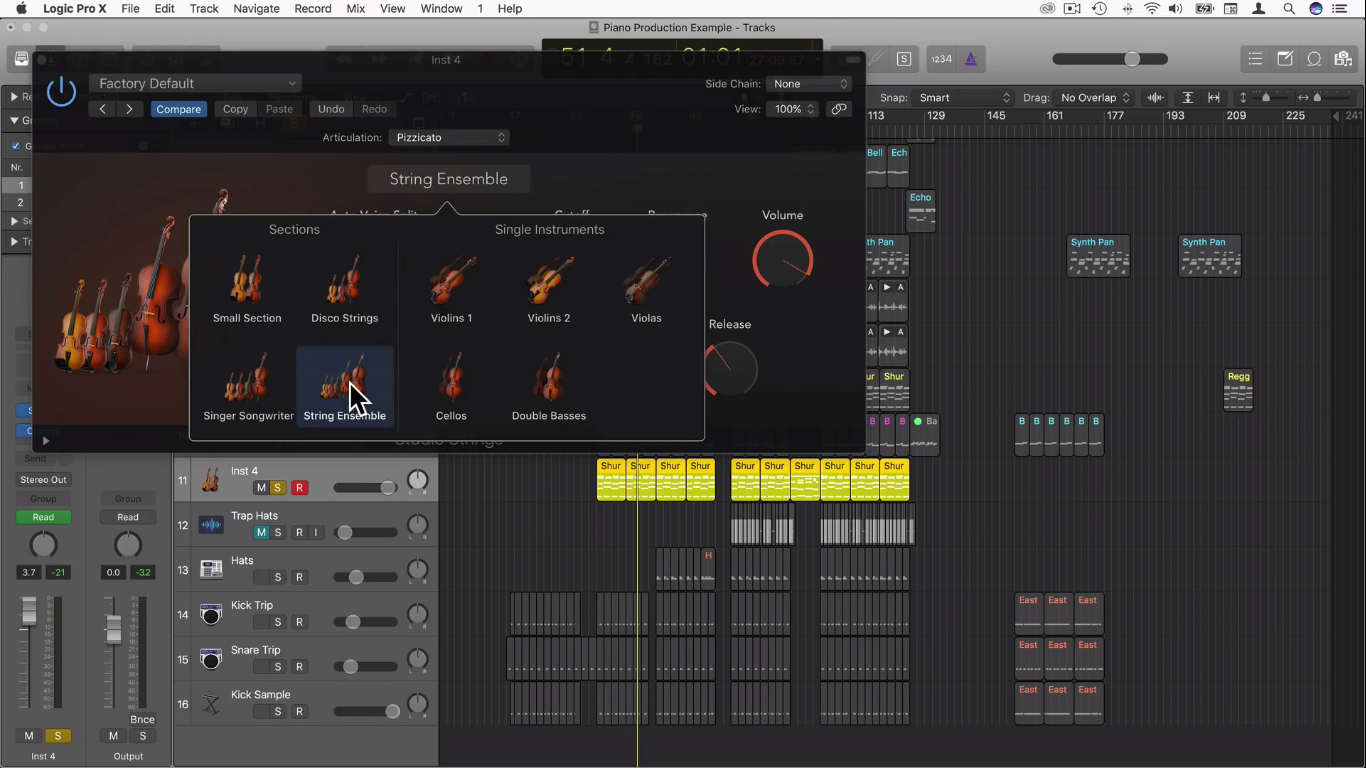
Let's hear what this sounds like if I go back into the strings and change it to String Ensemble. So, you can really hear that low double bass now. I think that might be a bit too much for this track.

I'm going to change it to Small Section because I think that low double bass is a bit too much as there are too many frequencies at that range for this track and using a small section could really work.
So, that's how you can use this Studio Strings software instrument in Logic Pro 10.4. I hope you find this useful.
Cheers,
Tomas George
